
Five years have passed and I have never used my passport and my goal in the next three years is to be able to travel aboard. Traveling clears my mind from everything, it also allows me to widen my perspective and be immersed in new experiences.
So my passport is about to expire and I want to be ready for just about anything. I needed to get it renewed before the end of this quarter. Passports are now valid for 10 years and I am excited to get mine renewed because as they say - The world is my oyster.
Before we start, here are a few tips:
- Use Google Chrome.
- Make sure you have a strong, steady wifi signal to avoid issues.
- The appointment system has 8 steps:
- Appointment Type - Individual or Group
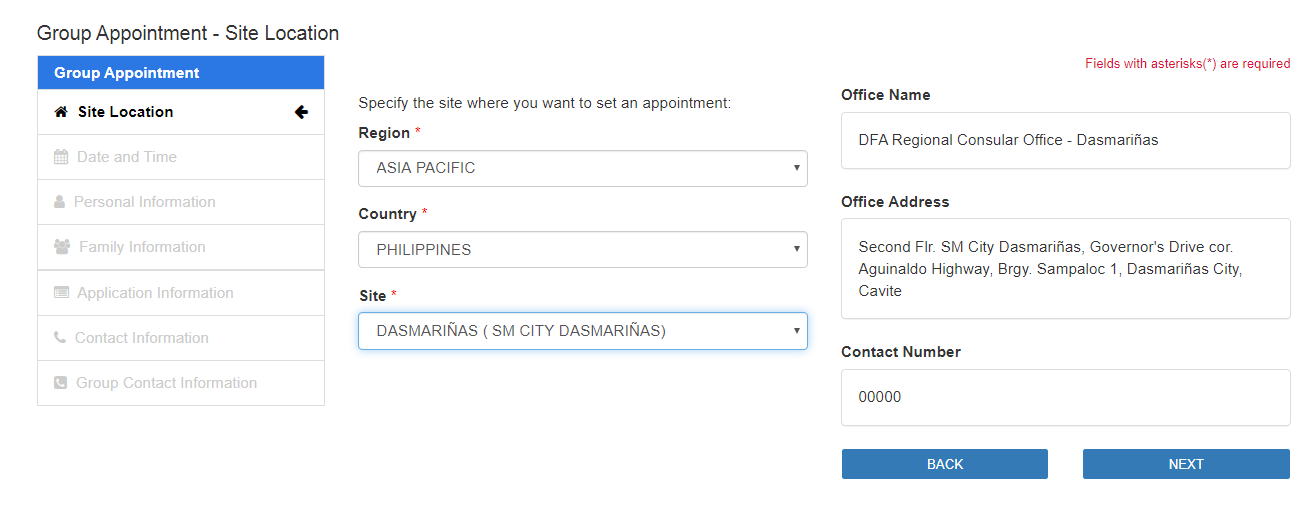
- Site Location
- Date and Time
- Personal Information
- Family Information
- Application Information
- Contact Information /Group Contact Information
- Payment Form
Here are the few simple steps to get your Philippine passport renewed from the DFA website.
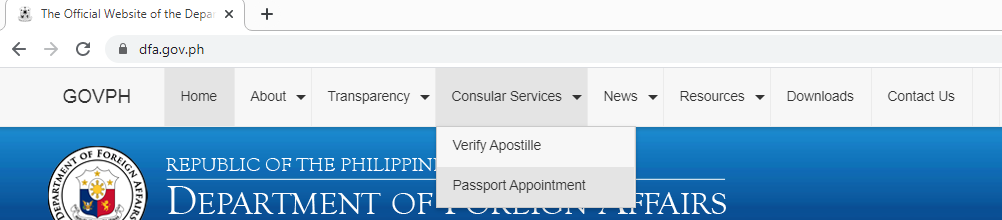
1. Head out to the DFA official website at https://www.dfa.gov.ph/. Look for the Consular Services tab and a dropdown will appear - select Passport Appointment.
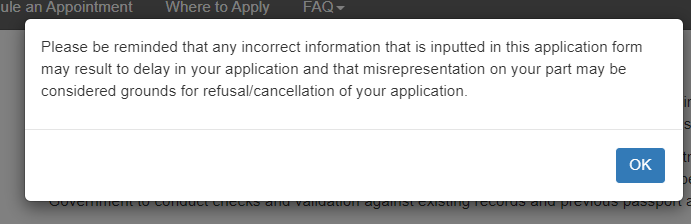
2. Once you select Passport Appointment, you will be routed to a new screen with this pop-up. Make sure that you read and provide accurate details on the form provided. Your passport can be used as a valid ID and it's not easy to get a replacement if you input incorrect details.
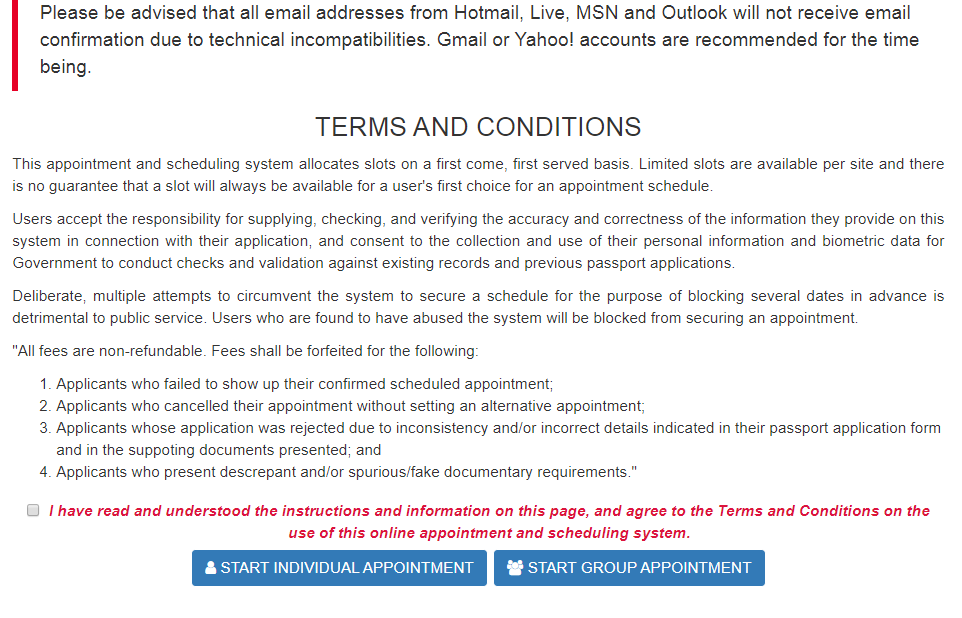
3. Once you click OK, please read the next page which stipulates all the terms and conditions for the appointment and scheduling system.

5. You will now be seeing a small pop-up providing you available slots between a period of three months. The schedule is between 12NN to 9PM Mondays to Saturday except for holidays.
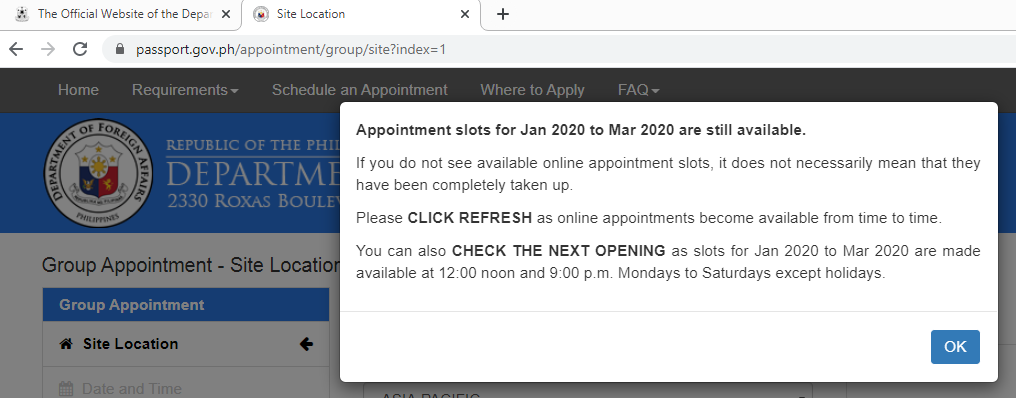
6. Select the Location closest to you and select the most convenient time to avoid missing your appointment.

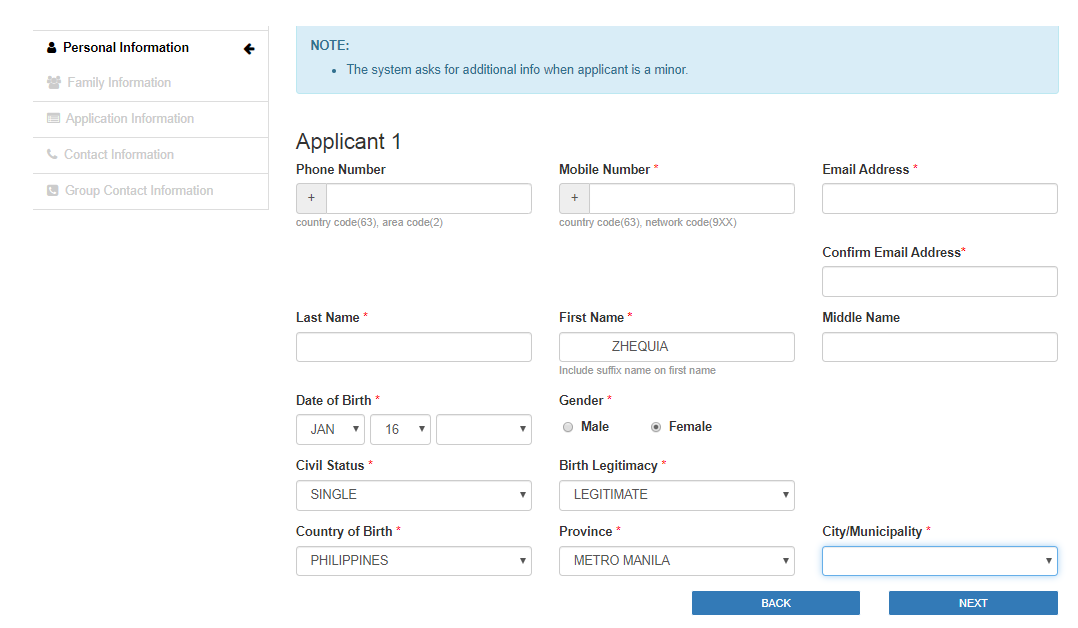
7. Personal Information is up next and make sure you fill out all the necessary details marked in red with an asterisk* sign. Be sure to check for correct spelling and most especially your birthdate!
8. Once done with the Personal Information, you will be asked for your Family Information. Read everything carefully especially the Mother's Maiden Name.

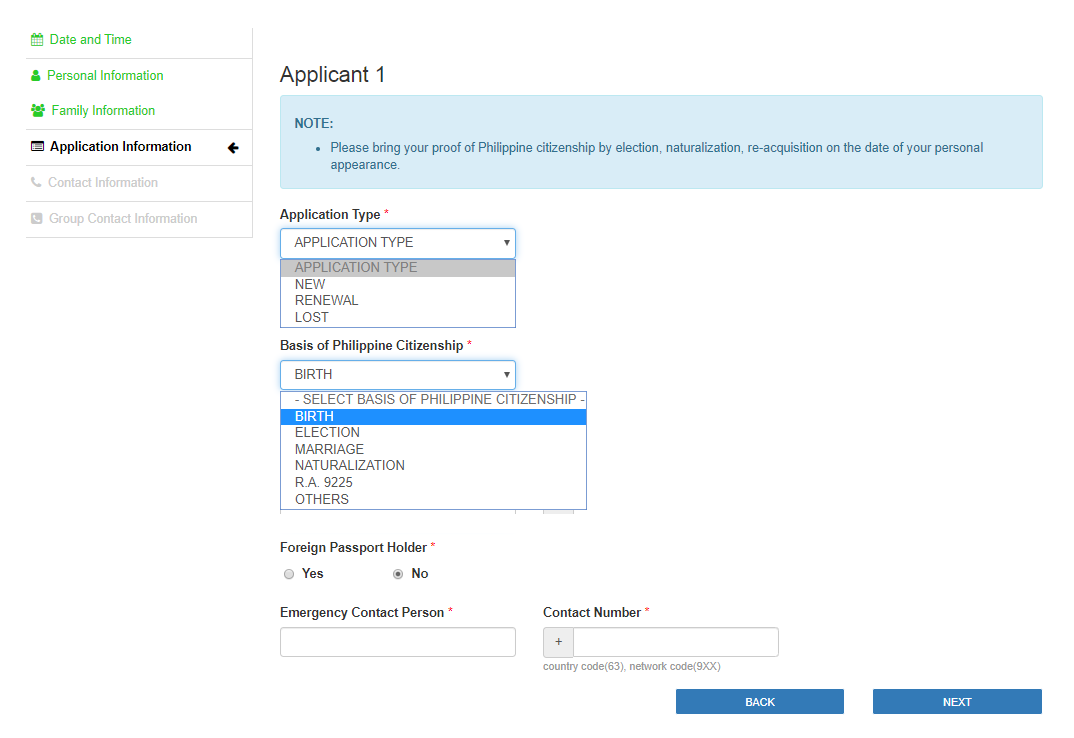
9. Last is the Application Information, which will ask if you are either: getting a new passport, renewal or for a lost passport.
10. For Group Appointments, once you are done with the Application Information you will be asked for Applicant 2's details starting from Personal Information, Family Information and lastly the Application Information. Then lastly, once all applicants have completed their details - you are required to provide Group Contact Information. Select which from your friends or family who is more reliable and responsible.
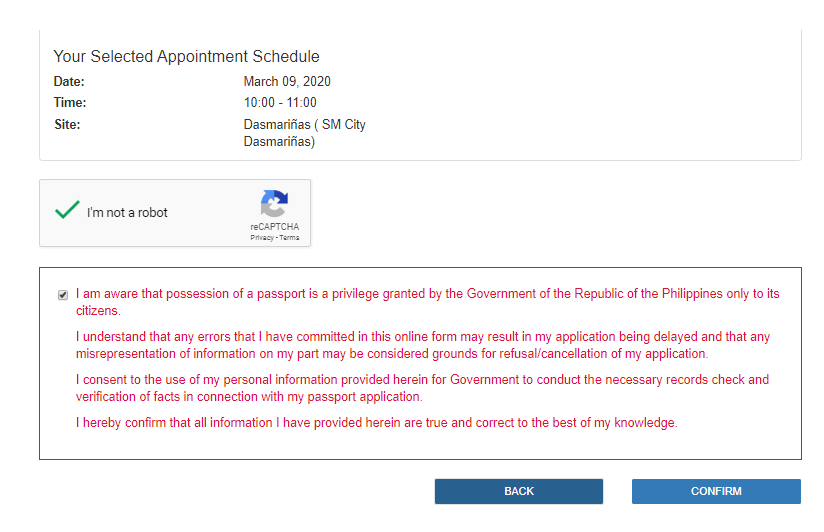
11. Before the payment, you are required to check the details for all applicants at the last screen and secure that you have ticked the small box before clicking on Confirm.
12. The payment screen allows you to select your processing type. As of this writing, Php950 for Regular Processing which takes 12 business days while Php1200 for Express Processing which takes between 6-7 business days depending on the location of your appointment.

13. You need to click Pay Now to get the appointment somewhat completed. There is no option to pay later which I definitely hope will become available soon. You will be sent out to the Bayad Center showing the General Guidelines in completing the transaction through select authorized partners.
When you set up an appointment online there is a Php50 convenience fee on top of the Php950 processing fee.

14. The Reference Number can be found on each applicant's email. Applicant 1 will have a unique reference number while Applicant 2 will have theirs as well. Each applicant needs to pay within 24 hours from the time you received the email.
Note: I was originally scheduled on March 9th but was not able to pay the appointment on time so I had to reschedule again and was lucky to get January 29th.

15. Once payment has been made, it only takes a couple of seconds to get you Confirmation Notification. Please follow the instructions within the e-mail as that will serve as your guide for what to do before you go to your DFA branch.


After you print everything out, please bring a photocopy of your old passport + photocopy of 1 valid government ID. Also just because you are renewing, doesn't mean that you should not bring extra IDs - bring some you may need it. Better safe than sorry. In case you need documents to be photocopied - you can do so at the end of the room.
16. Head out to your DFA Branch according to your appointment. I was scheduled at 10AM MLA and arrived at DFA at 10:15AM. Ideally, you should be in the branch 30 minutes before your scheduled appointment. However, I was scheduled at 10AM and we all had to wait for the mall to open. There will be 2 lines too: a line for renewal and another for the new application. We were queued by 10s and were asked not to use phones before heading in.
17. Before you head to the windows, your requirements will be checked by a Pre-Screening team upfront. This is where you will be asked for all print outs. Once all good, you will be given a priority number which will be visible on their TV screens. If your requirements are lacking or may need more items - you will be instructed what to do and how to complete. You will need to get back to the Pre-Screening team again before heading to the processing windows.
18. There were only 3 tellers for the Processing stage where they go over the details of your application. Please check pertinent details - birthday and spelling of your name. I was given an expectation that my passport will be ready by February 19 (regular) and February 13 (express). This is the stage where your old expired passport will be punched out. If your passport is still valid, it will not be punched as of yet.
I only spent 3 minutes here and was asked to proceed to the next stage.
19. You will be called again for the Encoding stage for the pictorial, fingerprint and e-signature. Pay attention to your details as they will allow you to do a final review before heading out. Do not rush this stage - check everything like your birthday which can be easily mistyped and the spelling of your name.
This is where you will be asked to sign a waiver and reminded that if you asked someone to claim your passport on your behalf an Authorization Letter is required.
I spent a good 5 minutes here.
Tip: If you have some redness in your face you will be asked to hide it with concealer which they will provide. If you feel like having a skin breakout is ready to happen during your appointment, bring your own concealer.
20. Final Instructions include releasing dates and hours of operations. The release of passports is only between 1PM-3PM. Bring with you the forms you signed at the encoding stage which has been stamped and you will need to bring your old passport too.
I stepped in DFA at 10:13AM and was done by 10:40AM. It was that fast! Passports are now 10 year valid so please take care of yours and travel the world as much as you can!


Social Plugin